Introduction
Single sign-on (SSO) is a session and user authentication service that permits a user to use one set of login credentials – for example, a name and password – to access multiple applications.
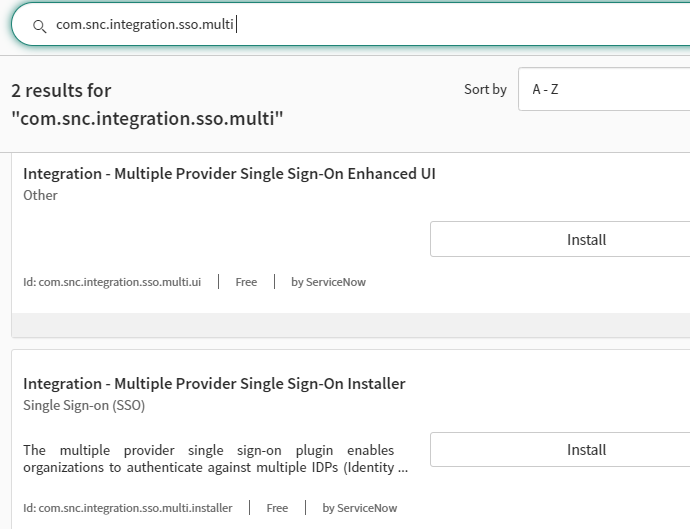
Available Plugin
- Integration - Multiple Provider Single Sign-On Enhanced UI
- Integration - Multiple Provider Single Sign-On Installer
To install plugin flow the below setps:
- Navigate to System Definition > Plugins.
- Find the plugin with the filter criteria and search bar.
- Activate the plugin.
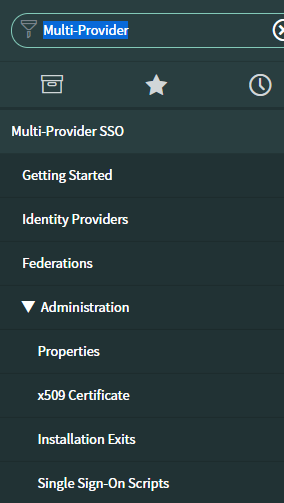
- After installing the plugin you can see below applications:
Property Update
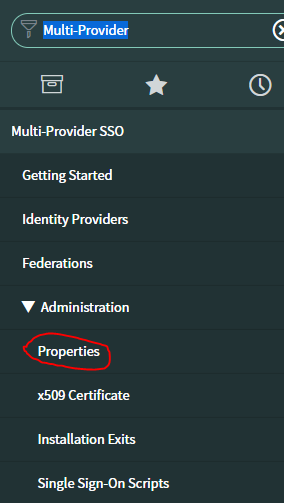
- Navigate to Multi-Provider SSO > Properties
- Select Yes for Enable Multiple provider SSO
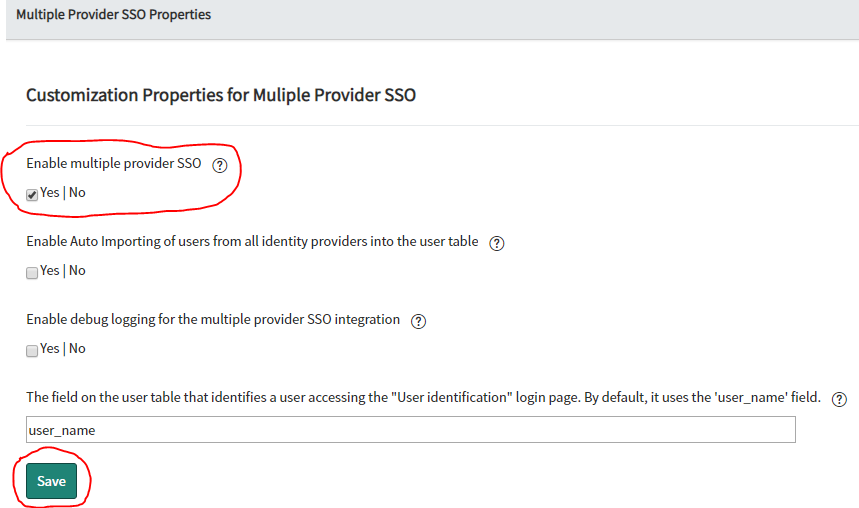
- Click Save.
SAML Configuration
- Navigate to Multi-Provider SSO > Identity Providers.
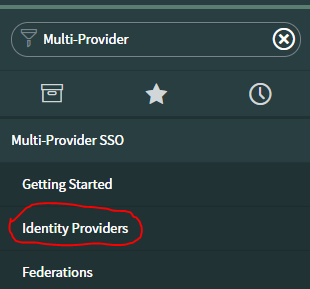
- Click New.

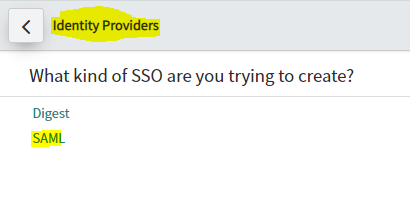
- You are asked what kind of SSO you are trying to create. Select SAML.
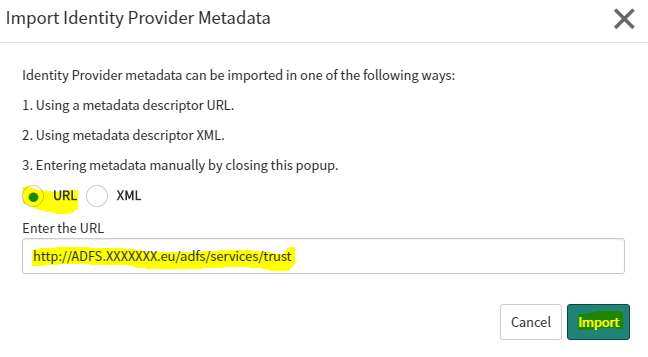
- An Import Identity Provider Metadata pop-up dialog appears.

- Copy and paste the following Metadata URL and click Import.
( Sign into the Okta Admin dashboard to generate this value)
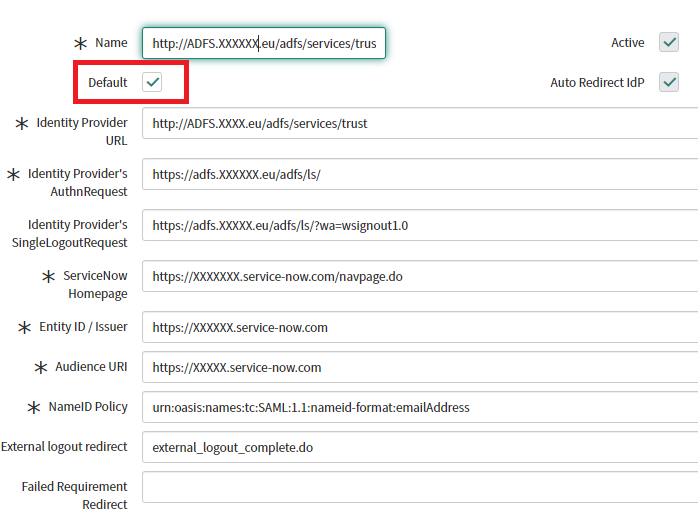
- A page opens with auto-populated SAML settings.
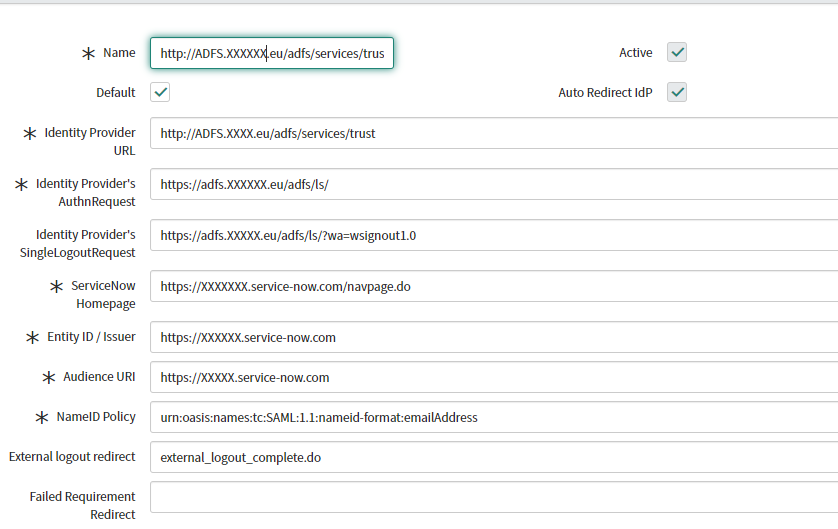
- If you want this SAML configuration to be the default, check Default.
- Refer to Multiple IdP section if you have multiple IdPs enabled.
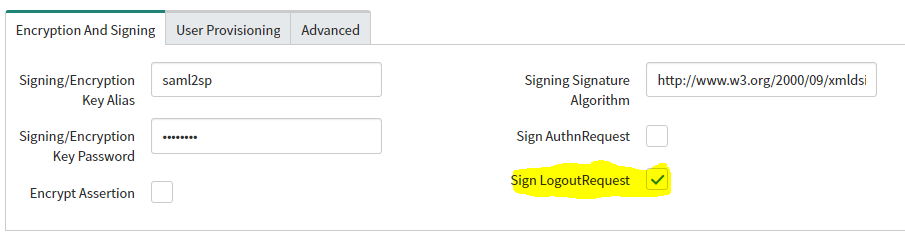
- Scroll down and select the Encryption and Signing tab and update below fields:
- Signing/Encryption Key Alias: Set to saml2sp

- If you created a different alias name for the SAML 2.0 keystore, enter that; otherwise, use saml2sp.
- Signing/Encryption Key Password: Enter the password to your SAML 2.0 Keystore. By default, the password is the same as the default alias name.
- Signing/Encryption Key Alias: Set to saml2sp
- Select the User Provisioning tab and uncheck Auto Provisioning User and Update User Record Upon Each Login.

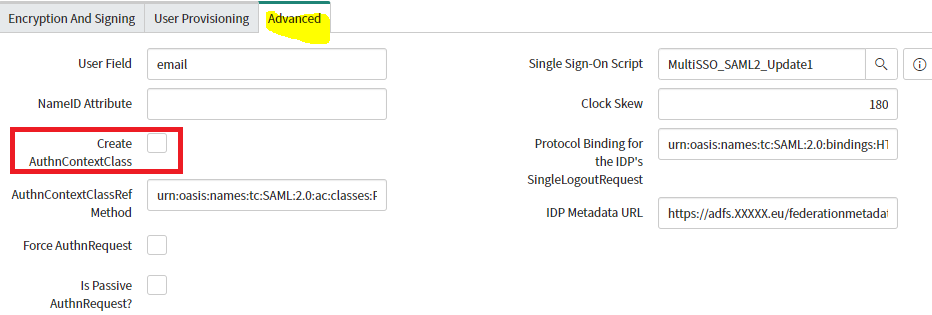
- Slect the Advanced tab update below field
- User Field: Specify the ServiceNow user attributes that you will be matching against Okta with SAML. By default, this is user_name, but can be configured to match other attributes such as email, depending on your use-case.
Note: You can select which field from the user profile on the SNOW side they want to match to, as the NAME id in SAML. It ca be email, username, or any other field on the user record.
- Check Create AuthnContextClass.
Testing
- To test the SAML connection,click Test Connection on the top right.

Activate
Once the SAML tests pass, click Activate to activate the Identity Provider you just set up.

Advanced Configuration
We can make more advance configuration like below:
- Force Authentication
- Single Log out
- SP-initiated SAML
Force Authentication
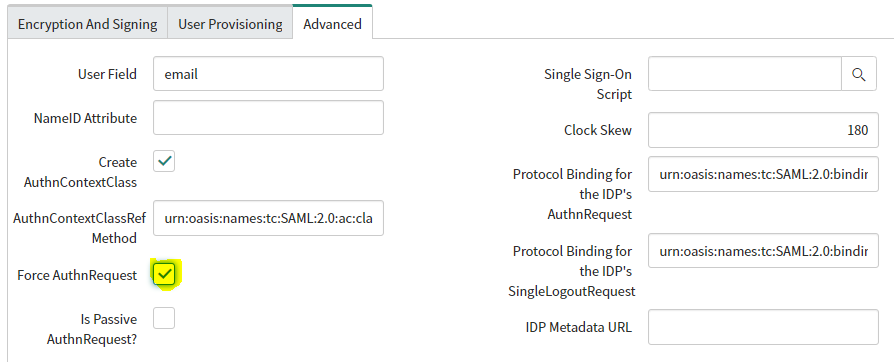
- Go to the Advanced tab >Check Force AuthnRequest.
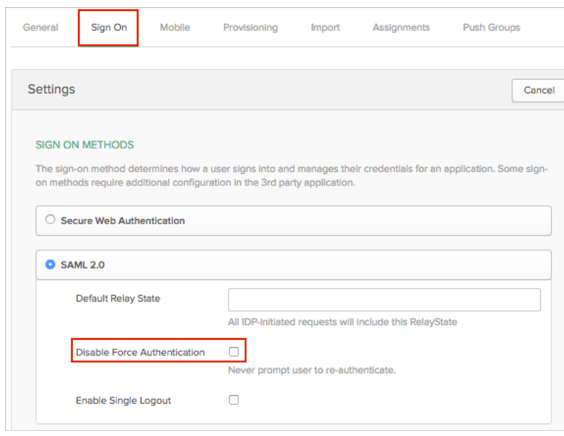
- In Okta, make sure you have unchecked the Disable Force Authentication option on the Sign On tab
- Click Update.
Single Log Out
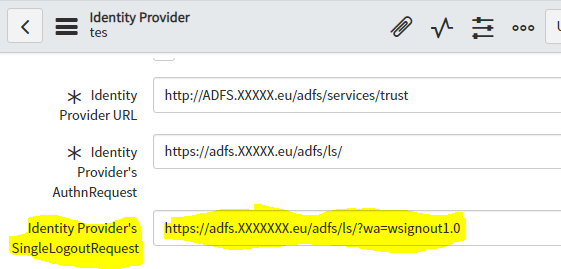
- Enter the following Identity Provider’s SingleLogoutRequest URL
(Sign into the Okta Admin Dashboard to generate this variable)
- Select the Encryption and Signing tab.
- Check Sign Logout Request.
- Select the Advanced tab. Change the Protocol Binding for the IDP’s SingleLogoutRequest to the following:
urn:oasis:names:tc:SAML:2.0:bindings:HTTP-POST

- Click Generate Metadata.

- The new metadata tab appears.
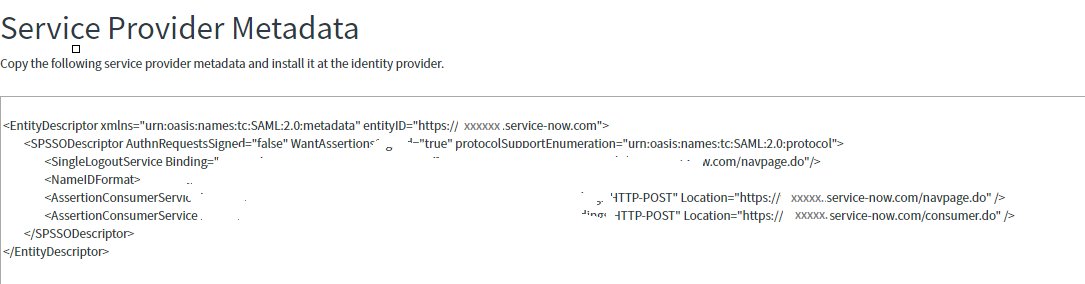
- Save the X509Certificate value.
Create a file in a text editor in the following format:
-----BEGIN CERTIFICATE----- [your x509 certificate value] -----END CERTIFICATE----- - Save the text file as servicenow_slo.cert
- In Okta, select the Sign On tab for the ServiceNow app, then click Edit.
- Check the Enable Single Logout box.
- Upload the servicenow_slo.cert file you saved earlier
- Click Save.
SP-initiated SAML
Determine which use case:
- Single IdP
- Multiple IdP - in this case, they need to set the sys_id for anyone who is not using the default IdP. sys_id does not need to be set for any user who’s going to go through the default IdP.
At this point, SAML single sign-on is configured for IdP-initiated flows from Okta into ServiceNow. To allow users to leverage Single Sign-On from the SP-Initiated flow (when they go directly to ServiceNow to log in), use the following instructions.
Note: SP-Initiated SAML can be enabled for an individual user or an entire company of users in ServiceNow. However, it cannot be enabled for specific groups of users.
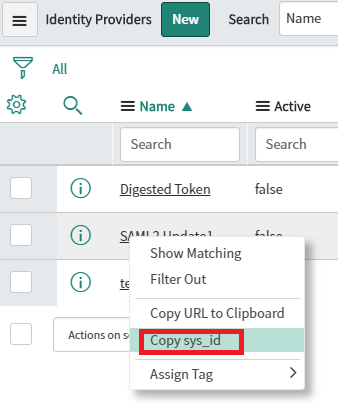
- Navigate to Multi-Provider SSO > Identity Providers.
- Right-click an identity provider record and select Copy sys_id.
 If you would like to enable SP-Initiated SAML on a user by user basis instead of for all users within a given company, do the following:
 - Go to sys_user table
- Select any user and open the record
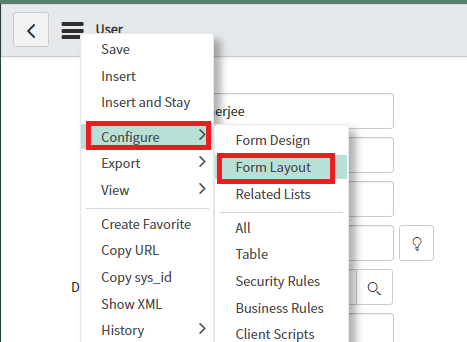
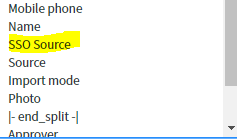
- Open the Form Layout and take SSO Source
- Click Save.
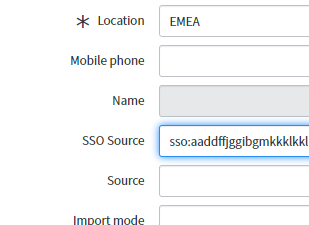
- In the SSO Source field, type sso:.Then paste the sys_id from the Identity Provider you created with the Multi-Provider SSO plugin and click on Save.
Users can now begin using SP-Initiated SAML with ServiceNow in two different ways.
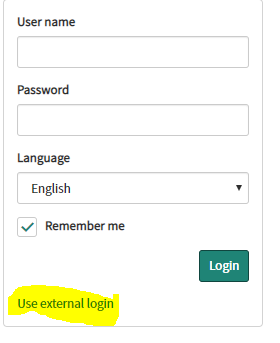
- When they navigate to the default ServiceNow login page, they can choose Use external login and then enter in their ServiceNow username in order to be redirected to Okta for SSO.
- Users can go directly to the following url: https://[ServiceNowDomain]/login_with_sso.do?glide_sso_id=[sys_id value]
- Understanding Request, RITM, Task in ServiceNow
- Steps to create a case in ServiceNow (CSM)
- Performance Analytics in 10 mins
- Event Management in 10 minutes - part1
- Event Management in 10 minutes - part2
- Custom Lookup List
- Script includes in 5 minutes
- Interactive Filter in 5 minutes
- UI Policy in 6 Minutes
- Client Side Script Versus Server Side Script in 3 minutes
-
Snow
- Performance Analytics
- ServiceNow Scripts
- Script include
- Useful scripts
- Basic Glide Scripts
- Client Script
- Advance Glide Script
- Glide System Script
- Admin
- Import Set
- Work Flow
- ACL
- SLA
- Notification
- Core Application
- UI Policy
- UI Action
- Client Script
- CAB Workbech
- Data Policy
- Connect Support
- Catalog
- Discovery
- CSM
- Event Management
- HR
- Integrations
- SSO Integration
- LDAP Integration
- SCCM Integration
- AWS Intergration
- Slack Integration
- CTI Integration
- Jira Integration
- Ebonding ServiceNow
- SOAP Integration
- IBM Netcool Integration
- VIP Mobile App Integration
- Rest Integration
- Service Portal
- Questions
- ACL
- Performance analytics(PA) Interactive Filter
- Various Configurations in Performance analytics(PA)
- Service Portal
- Performance Analytics(PA) Widgets
- Performance Analytics(PA) Indicator
- Performance Analytics(PA) Buckets
- Performance Analytics(PA) Automated Breakdown
- Client Script
- Rest Integration
- Understanding the Request, RITM, Task
- Service Catalogs
- Events in ServiceNow
- Advance glide script in ServiceNow
- CAB Workbench
Author
Chandrima
With 9+ years of ITSM development experience,Chandrima likes to deep dive ServiceNow modules.She have extensively worked on PA,Service Portal,Event management.
Comments