Introduction
Probably you have already heard of Jhipster. The reason you ended up here might be because you are looking for Jhipster blueprint examples. Although there is an example guide in the official doc of Jhipster here but I was looking for a complete and simple example which I can clone and reuse to kickstart.
Feel free to use my version of the blueprint generator sample source code
I have added installation instructions there too.
Few terms to know
Yeoman Simply to put yeoman is code-generation tool.Jhipster internally uses Yeoman generator to generate blueprints.
Sub generator Sub generators are actually part of the templates which Jhipster allows you to override with your version of code. For example you may want to add a kotlin version of microservice, in that case you have create a blueprint that will override the sub generators.
Jhipster Blueprint Blueprint is yeoman generator that allows overriding of sub generators. Basically this are all the content under generator folder which we allowed to override using Jhipster extend functionality. For example , in this tutorial we are going to override a server side java application so we choose to override the server module
Below are the list of allowed sub-generator
- common
- client
- server
- entity
- entity-client
- entity-server
- entity-i18n
- languages
- spring-controller
- spring-service
Our usecase
We will try to cover 2 simple yet important usecase.
- Whether we are able to override the server sub-generator and create our own version of classes
- Whether we are able to add additional questions to the list of question asked while running Jhipster
Based on the answer we received in the prompt we are going to dynamically add it to our sub-generator.
The project structure
├── generators
│   └── server           // the sub-generator we
│       ├── files.js     // this file loads the templates and replaces with runtime content
│       ├── index.js     // We extended the server module of Jhipster sub-generator here
│       ├── prompts.js   // we write our custom prompt(question)
│       └── templates
│           └── src
│               └── main
│                   ├── java
│                   │   └── package
│                   │       └── Application.java.ejs  // the template file
│                   └── resources
│                       └── banner.txt  // a file which is not a template
Lets Dive In
Let us first look into the index file.
we extend by using ServerGenerator class of Jhipster
module.exports = class extends ServerGenerator you will find various phases here like initializing ,prompting, configuring, writing. To override any of this phase we have 3 options
- Let Jhipster handle a phase, blueprint doesn’t override anything.
return super._initializing() - Override entirely
return { myCustomInitPhaseStep() { // Do all your stuff here } }; - Get the best of both
return Object.assign( this._prompting(),super._prompting());
Note In our case we are going to use the 3rd option that is mixed mode, so that we retain the existing question and only append our question Also we are going to override the prompting phase
  _prompting() {
        return {
            askForTshirtSizes: prompts.askForTshirtSizes
        };
    }

    get prompting() {
         return Object.assign( this._prompting(),super._prompting());
    }
In the prompt we are going to ask for a Tshirt size as small,medium,large and based on the prompt output we are going to add it to our java class. So lets go to the prompt js file and see how we design the question
function askForTshirtSizes(meta) {
    const applicationType = this.applicationType;
        const prompts = [
            {
                when: response => applicationType === 'microservice',
                type: 'list',
                name: 'tShirtSize',
                message:
                    'Which flavour you want to use',
                choices: [
                    {
                        value: 'simple',
                        name: 'simple'
                    },
                    {
                        value: 'medium',
                        name: 'medium'
                    },
                    {
                        value: 'advance',
                        name: 'advance'
                    }
                ],
                default: 'simple'
            }
        ];

        if (meta) return PROMPTS; // eslint-disable-line consistent-return
        const done = this.async();
        this.prompt(prompts).then(props => {
            this.tshirtSize = props.tShirtSize;
            done();
        });
}
Observe that we have used a check applicationType === 'microservice'
This will ensure that the prompt is only added in case of a microservice questionnaire
Now lets look into the file.js. This is the file which handles the meta tag replacement
const serverFiles = {
    serverResource: [
        {
            path: SERVER_MAIN_RES_DIR,
            templates: [{ file: 'banner.txt', method: 'copy', noEjs: true }]
        }
    ],
    serverJavaApp: [
        {
            path: SERVER_MAIN_SRC_DIR,
            templates: [{ file: 'package/Application.java', renameTo: generator => `${generator.mainClass}.java` }]
        }
    ]
};
we simply have 2 files here, the first file we don’t want the template to work.As it is static file (just to copy it over) in such scenario we use noEJs
The template file we are going to do the dynamic addition of the prompt answer we have received earlier
Now let us look at the template
This is quite familiar with JSTL,thymeleaf templates.If you have worked on any EL expression front end modeling stuff this will very familiar to you.
So basically any dynamic content should be under <%= tshirtSize %>
Important to note here is the name field which is mentioned in the prompts
when: response => applicationType === 'microservice',
                type: 'list',
                name: 'tShirtSize',
should match with what we mention in the template file enclosures.
Lets see it in action
To use this blueprint we have to link to our local NPM installation. The detail instruction is available in the github readme file.
Create a new dir where we want to create a project and cd to it
Then run
jhipster -d --blueprint testbp
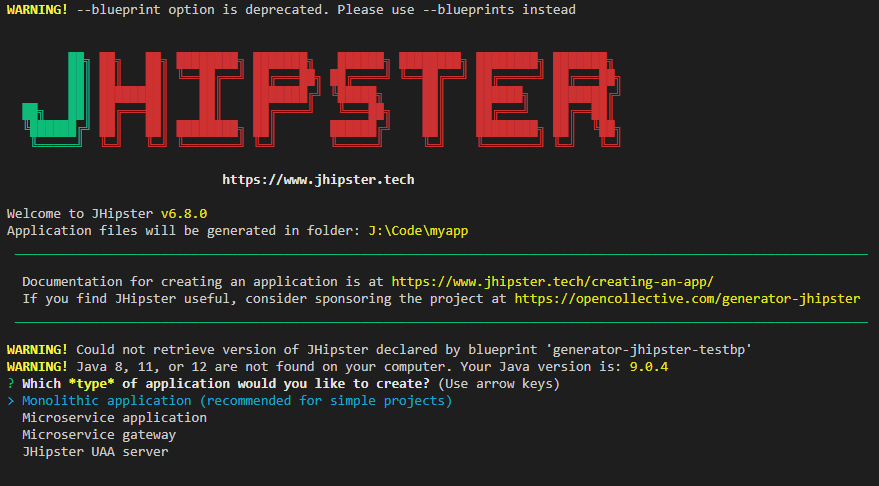 Select No and defaults as appropriate, wait until we see our prompt like below
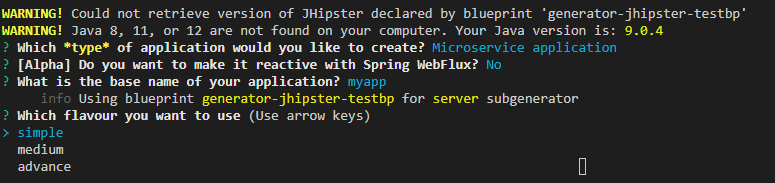 we can see our prompt in there!
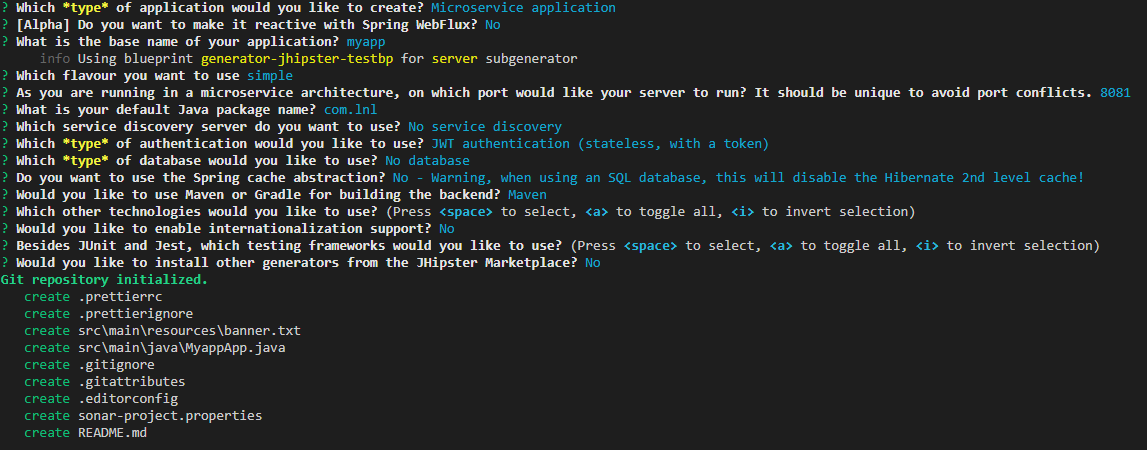 Now lets complete the process and see output!
Generated files looks like below
 Finally lets look into the java class ans see if our tshirtSize changed to simple
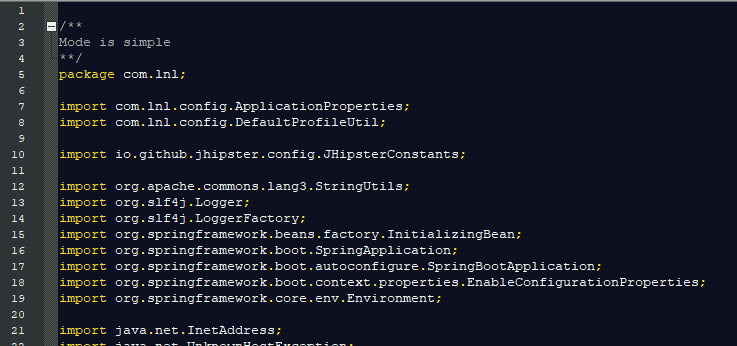
We see it has changed our comments to Mode is simple
Conclusion
Off course this is just a beginning to us Jhipster template.But this shows to virtually do a string replace to anything using various custom prompts. Hope you got the idea.Generate your own blueprints and share with the world!
- Understanding Request, RITM, Task in ServiceNow
- Steps to create a case in ServiceNow (CSM)
- Performance Analytics in 10 mins
- Event Management in 10 minutes - part1
- Event Management in 10 minutes - part2
- Custom Lookup List
- Script includes in 5 minutes
- Interactive Filter in 5 minutes
- UI Policy in 6 Minutes
- Client Side Script Versus Server Side Script in 3 minutes
- Java
- ACL
- Performance analytics(PA) Interactive Filter
- Various Configurations in Performance analytics(PA)
- Service Portal
- Performance Analytics(PA) Widgets
- Performance Analytics(PA) Indicator
- Performance Analytics(PA) Buckets
- Performance Analytics(PA) Automated Breakdown
- Client Script
- Rest Integration
- Understanding the Request, RITM, Task
- Service Catalogs
- Events in ServiceNow
- Advance glide script in ServiceNow
- CAB Workbench
Author
Sayan
With 11+ years of IT experience with wide range of skill sets. Starting from architecting infrastructure on cloud, building fault tolerant scalable Microservices in Java, Scala, Python, orchestrating their deployment through containers and managing their lifecycle through Devops.
Comments