Introduction
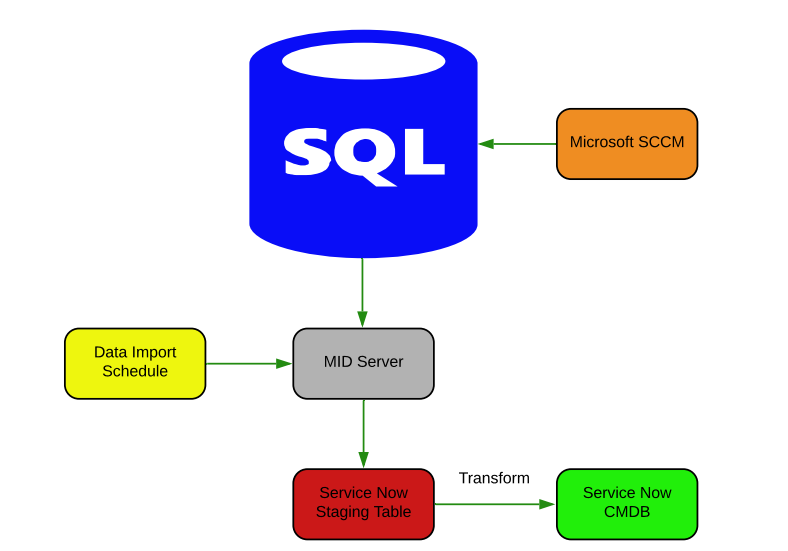
The Microsoft SCCM integration is a one direction import of SCCM data into the ServiceNow’s Configuration Management Database (CMDB).
Available Plugin
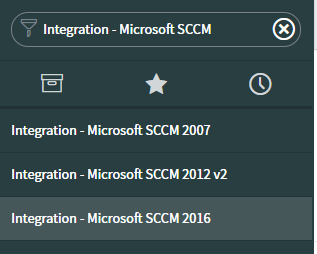
Integration - Microsoft SCCM 2007 Integration - Microsoft SCCM 2012 v2 Integration - Microsoft SCCM 2016 Microsoft SCCM Spoke for IntegrationHub
To install plugin flow the below setps:
- Navigate to System Definition > Plugins.
- Find the plugin with the filter criteria and search bar.
- Activate the plugin.
MID Server Installation
Create the User Account for the ServiceNow MID Server. Install a ServiceNow MID Server in Your Organization. Validate Communication Between the ServiceNow MID Server and ServiceNow.
For deatils information find below links
Creating a SQL Server Account for the ServiceNow Data Source
A SQL Server user account helps to connect the MID Server to the SCCM database for use with the ServiceNow data sources. Without this account the MID Server will not be able to access the SCCM database.
Steps:
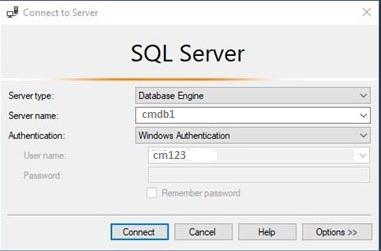
- Launch SQL Server Management Studio (SSMS).
- Have an SCCM administrator login into SQL Server Management Studio
- Server type: Database Engine
- Server name: Your SCCM SQL Server
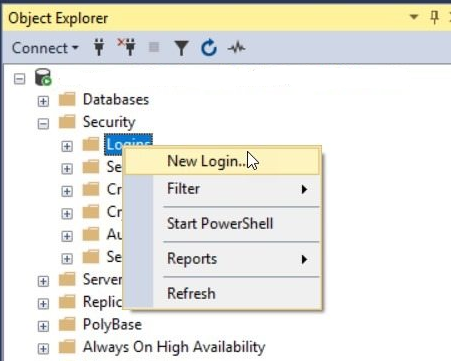
- Go to Security > Logins
- Right Click Logins, and Select New Login
- General Page
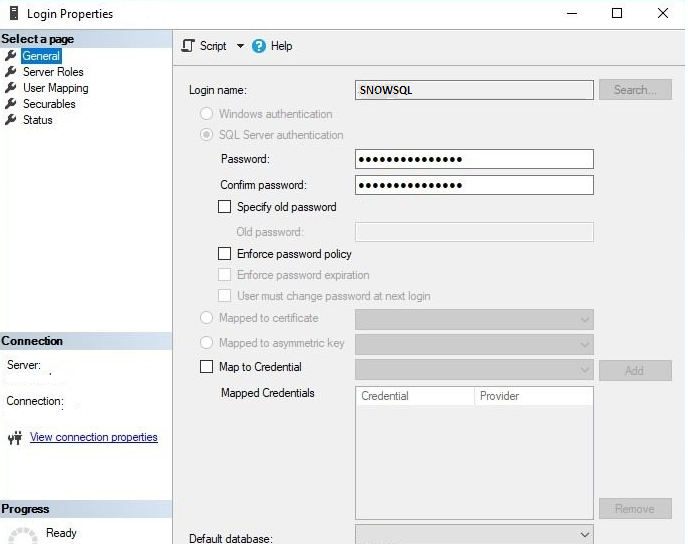
- SQL Server Authentication: true
- Login name: select login name
- Password: select password
- Enforce password policy: true
- Default Database: select your sccm database
- User Mapping Page
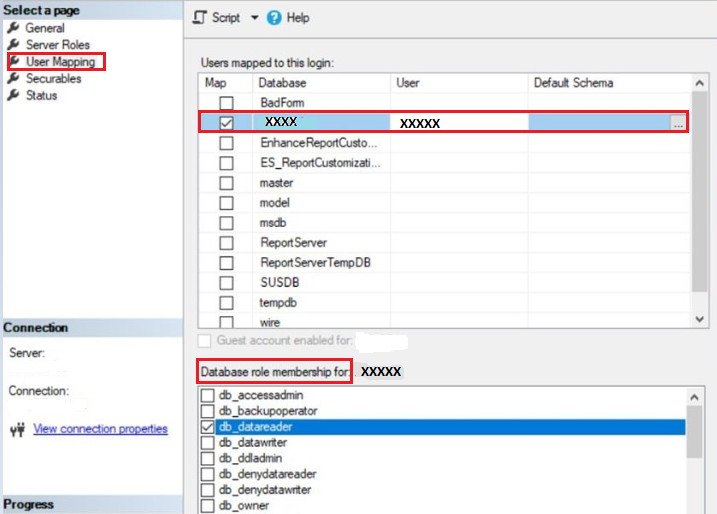
- Select SCCM Database
- Add Database Role: db_datareader
- Click Ok
Integration Setup
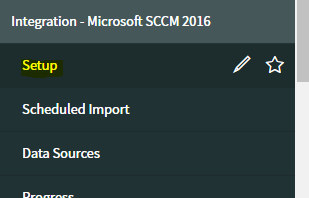
- Navigate to Integration - Microsoft SCCM(version) .
- Click on Setup
- Fillup all the deatils
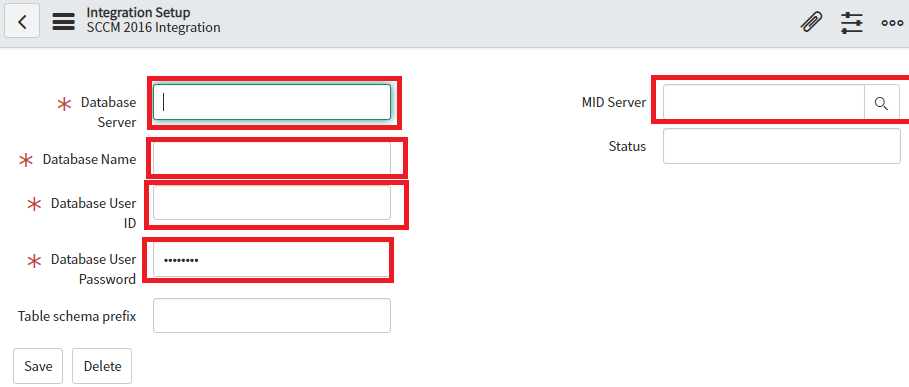
- Click Test data source connections to test the connection to the SCCM database.
Scheduled Data Imports
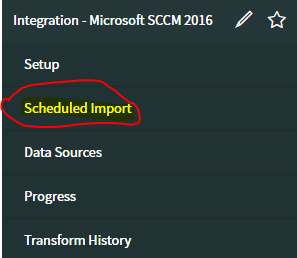
- Navigate to Integration - Microsoft SCCM > Scheduled Import.
- Select a calendar interval (Day, Week, etc.) in the Run field and specify the time of day the import should run.
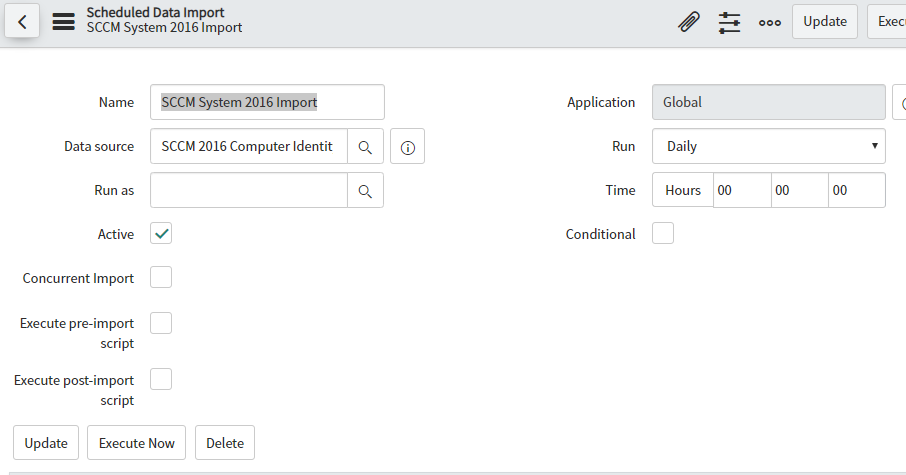
- Select the “Run as” user for the data import.

- Click Save
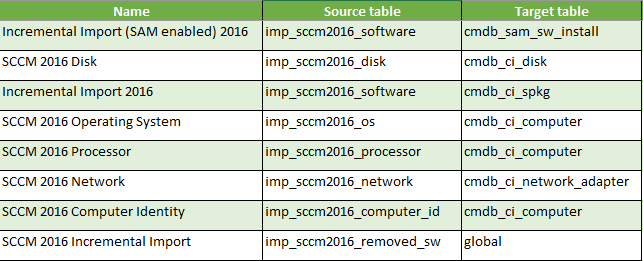
- Run the following imports when complete
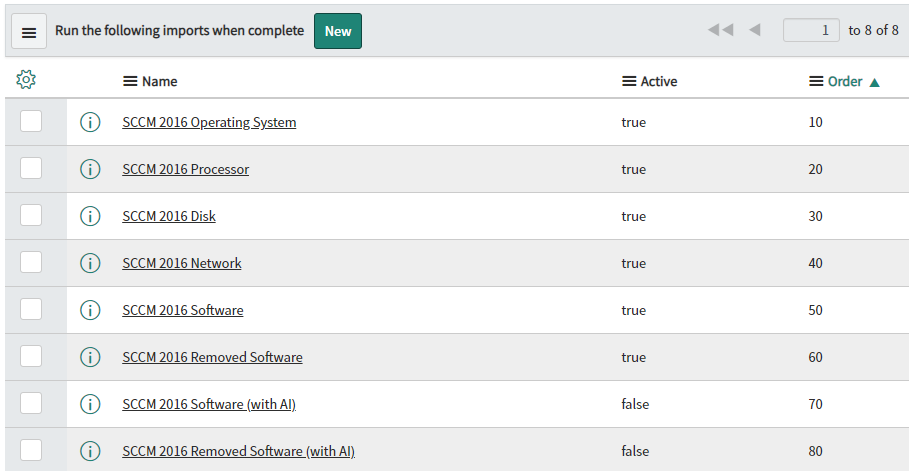
Configure Child Scheduled Imports: Underneath the Parent “SCCM 2016 Computer Identity” import, there are child imports that run after completion. Deactivate or Activate imports as needed.
SCCM 2016 Operating System: This is supplemental import that updates the cmdb_ci_computer table with Operating System information.
SCCM 2016 Processor: This is supplemental import that updates the cmdb_ci_computer table with Operating System information.
SCCM 2016 Disk: This is supplemental import that updates the cmdb_ci_disk table. For large SCCM databases, sometimes this is turned off due to size.
SCCM 2016 Network: This is supplemental import that updates the cmdb_ci_network_adapter table. For large SCCM databases, sometimes this is turned off due to size.
ASSET INTELLIGENCE: Asset Intelligence is an SCCM feature that can filter, normalize and clean up software records. When enabled, it populates normalized software data in a separate table within the SCCM database. You can target this separate table instead of the raw software data table. When you import software records into the CMDB with this feature enabled, you get a cleaner set of software data.
If you have AI for SCCM, you’ll need to activate some Scheduled Imports and disable others
- SCCM 2016 Software: This is for non-AI scheduled imports. This is activated by default, deactivate if using AI.
- SCCM 2016 Removed Software: This is for non-AI scheduled imports. This is activated by default, deactivate if using AI.
- SCCM 2016 Software (with AI): This is for AI scheduled imports. This is deactivated by default, activate if using AI.
- SCCM 2016 Removed Software (with AI): This is for AI scheduled imports. This is deactivated by default, activate if using AI.
Collect software data with either SCCM or Discovery
When Discovery and SCCM are both enabled on a system, the software records found through both tools could overwrite each other.
- Navigate to Discovery Definition > Properties.
- Set the Windows software is SCCM managed property (glide.discovery.software_sccm_managed) appropriately. If this property is set to Yes, software for computer CIs is populated in the CMDB by SCCM. An internal process determines that the computer is managed by SCCM, and Discovery does not populate the software records for Windows software data. The following information level message is written to the Discovery log file. Skipping software population because the CI is managed by SCCM If the check box is cleared, the property is set to No, and the system manages software data with Windows.
- Click Save.
Note: If SCCM Integration is active before Discovery is enabled and the property is enabled, Discovery ignores the population of software for any CIs that are also imported through SCCM. If Discovery is enabled before the SCCM Integration, it is possible for software installation data from both sources to be mixed.
Transform Maps
Below OOTB transform maps are available in ServiceNow
- Understanding Request, RITM, Task in ServiceNow
- Steps to create a case in ServiceNow (CSM)
- Performance Analytics in 10 mins
- Event Management in 10 minutes - part1
- Event Management in 10 minutes - part2
- Custom Lookup List
- Script includes in 5 minutes
- Interactive Filter in 5 minutes
- UI Policy in 6 Minutes
- Client Side Script Versus Server Side Script in 3 minutes
-
Snow
- Performance Analytics
- ServiceNow Scripts
- Script include
- Useful scripts
- Basic Glide Scripts
- Client Script
- Advance Glide Script
- Glide System Script
- Admin
- Import Set
- Work Flow
- ACL
- SLA
- Notification
- Core Application
- UI Policy
- UI Action
- Client Script
- CAB Workbech
- Data Policy
- Connect Support
- Catalog
- Discovery
- CSM
- Event Management
- HR
- Integrations
- SSO Integration
- LDAP Integration
- SCCM Integration
- AWS Intergration
- Slack Integration
- CTI Integration
- Jira Integration
- Ebonding ServiceNow
- SOAP Integration
- IBM Netcool Integration
- VIP Mobile App Integration
- Rest Integration
- Service Portal
- Questions
- ACL
- Performance analytics(PA) Interactive Filter
- Various Configurations in Performance analytics(PA)
- Service Portal
- Performance Analytics(PA) Widgets
- Performance Analytics(PA) Indicator
- Performance Analytics(PA) Buckets
- Performance Analytics(PA) Automated Breakdown
- Client Script
- Rest Integration
- Understanding the Request, RITM, Task
- Service Catalogs
- Events in ServiceNow
- Advance glide script in ServiceNow
- CAB Workbench
Author
Chandrima
With 9+ years of ITSM development experience,Chandrima likes to deep dive ServiceNow modules.She have extensively worked on PA,Service Portal,Event management.
Comments