Introduction
In this post we will do a POC to show how to integrate AWS and ServiceNow.The usecase is when we create a new EC2 instance in AWS then AWS SNS triggers a notification to ServiceNow. This notification finally creates a server in CMDB.
Overview
We are going to create a LAMP stack using AWS CloudFormation template.We will then use AWS Config to monitor any changes in the configuration of this server. SNS provides topics for pushing messages for these resources.When a change is detected by AWS Config then SNS is trigger which publishes the message to the topic which ServiceNow instance have subscribed to.
Steps followed
- Configure ServiceNow.
- Create an SNS topic and subscription.
- Confirm the SNS subscription in ServiceNow.
- Create a handler for the subscription in ServiceNow.
- Configure AWS Config.
Configure ServiceNow
- Log in to the developer instance.
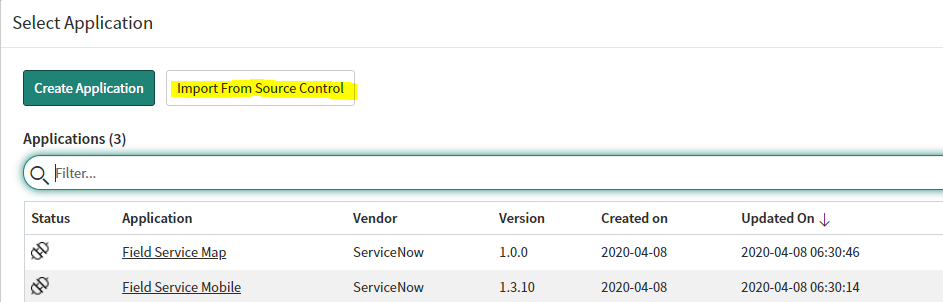
- Navigate to
System Applications > Studio
- Click on Import From Source Control.
- On the Import Application screen, enter the following details and Click on Import.
       URL: https://github.com/sayanawsit4/snow-aws.git
       User Name: Git hub user Name
       Password: Git hub password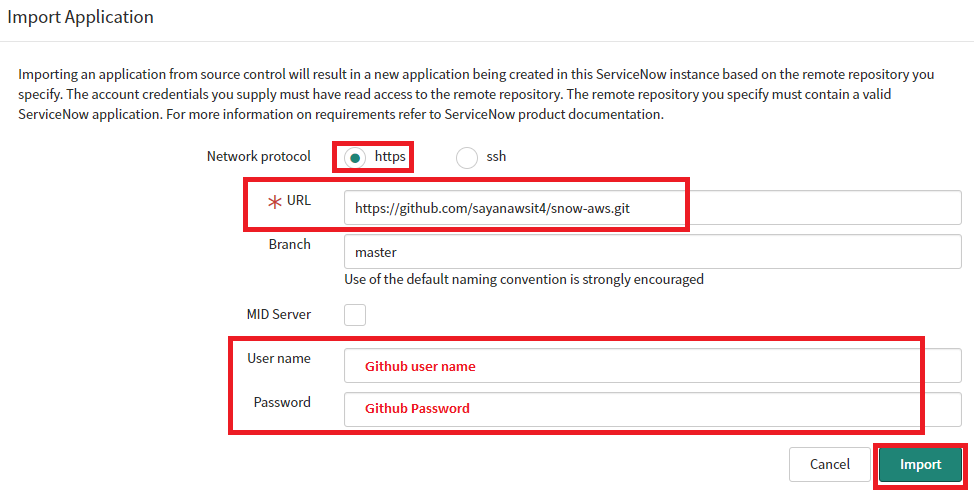
- Close the Studio browser tab.
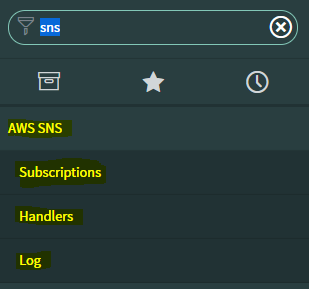
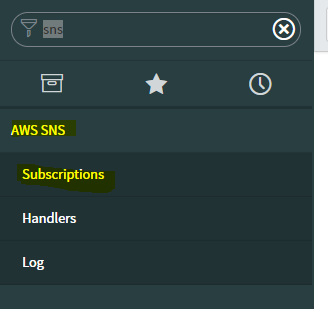
- In the left Pane ,Navigate to SNS
Create an SNS topic and subscription
Perform the following procedures to create an SNS topic and subscription:
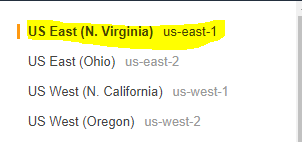
- Log in to the SNS console, and select the US-East (N. Virginia) Region.
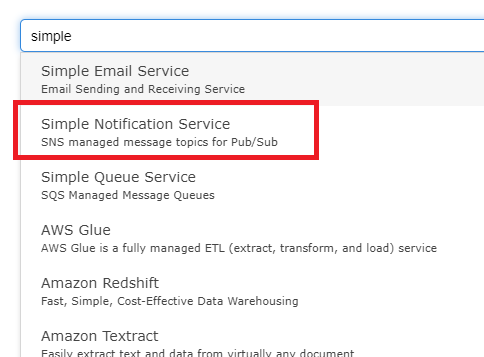
- Click on services > type Simple in the search Box
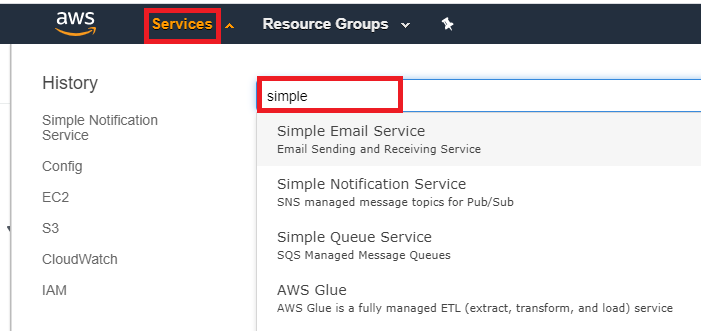
- Click on Simple Notification Service
- Create a Topic
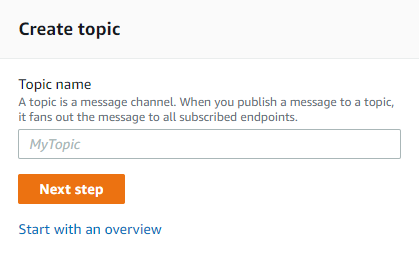
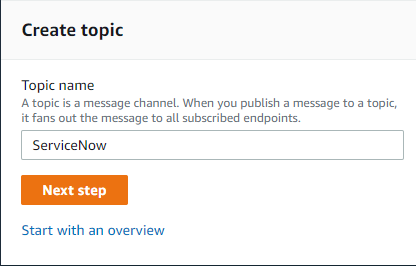
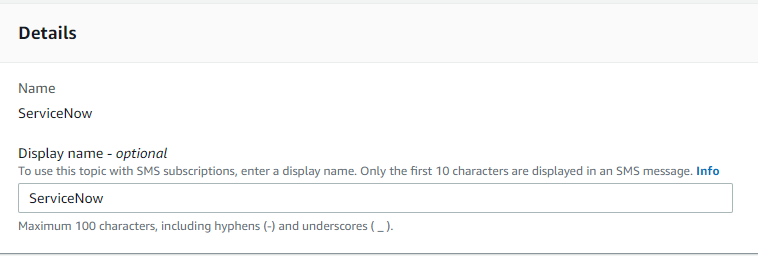
- Give the topic a name, make the display name ServiceNow, and choose Create Topic.
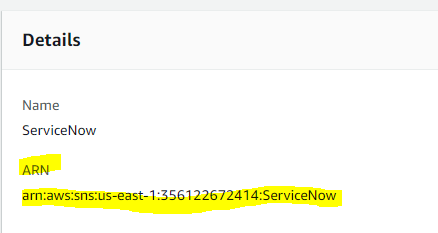
- Select the Amazon Resource Name (ARN) link for the topic that you just created.
- Choose Create Subscription.
- Choose HTTPS protocol.
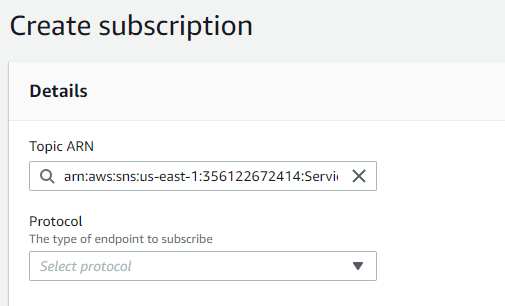
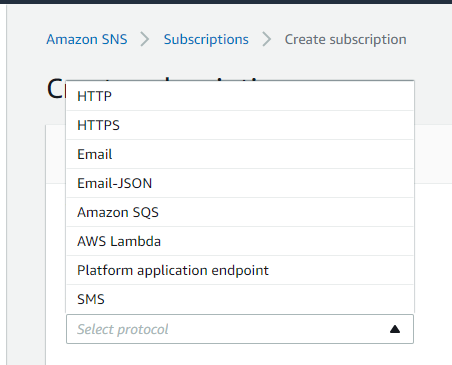
For Endpoint, use the service now administrator user id & password and then enter the developer instance link,which is rendered like the following: https://admin:<ServiceNow admin:password>@<your developer instance>.service-now.com/api/x_snc_aws_sns/aws_sns eg:https://admin:****@dev64666..service-now.com/api/x_snc_aws_sns/aws_sns - Choose Create Subscription.
Your new subscription is pending confirmation.
Confirm the SNS subscription in ServiceNow
Before allowing SNS to send messages to ServiceNow, confirm the subscription on ServiceNow. At this point, AWS already sent a handshake request, which is awaiting confirmation inside your ServiceNow instance.
- Navigate to SNS in the service now instance > Subscriptions.
- Notice that AWS created a new record.
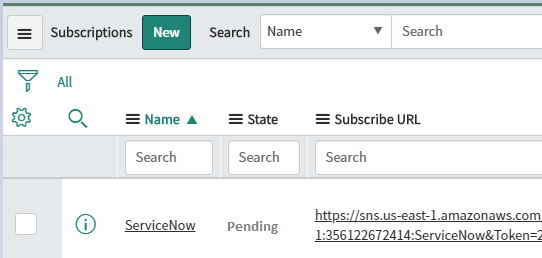
- Open the subscription by choosing ServiceNow, then choose Confirm Subscription.
Create a handler for the subscription in ServiceNow
Now, set up ServiceNow to be able to absorb received messages from AWS. Create a handler that’s able to create a new record in the CMDB Server table (cmdb_ci_server) whenever a new EC2 instance is created from a sample AWS CloudFormation stack.
To set up the handler, follow these steps:
- At the bottom of the Subscriptions form, for Handler Related list , choose New and then provide a name for the handler,such as Create CMDB Server from EC2.

- Enter the following code inside the function:

      var webserver = new GlideRecord("cmdb_ci_server");
      webserver.initialize();
      webserver.name = "AWS WebServer "+message.configurationItem.configuration.launchTime ;
      webserver.short_description = "Monitoring is "+message.configurationItem.configuration.monitoring.state+" and Instance Type is "+message.configurationItem.configuration.instanceType ;
      webserver.asset_tag = message.configurationItem.configuration.instanceId ;
      webserver.insert();
Choose Submit
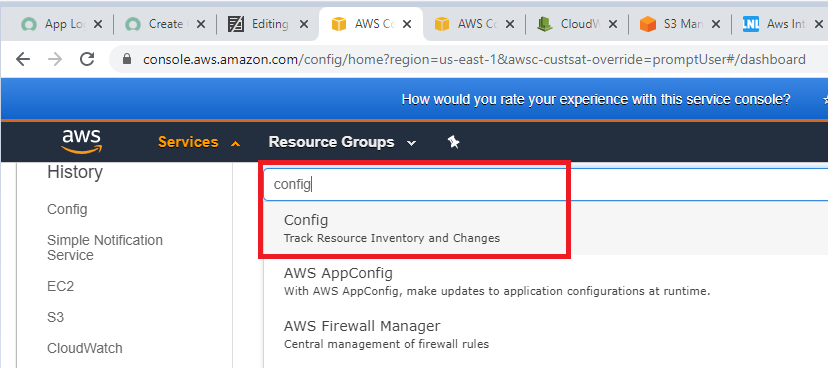
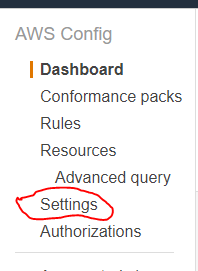
Configure AWS Config
- Click on services > type config in the search Box

- Select Config
- In the left navigation pane, choose Settings.
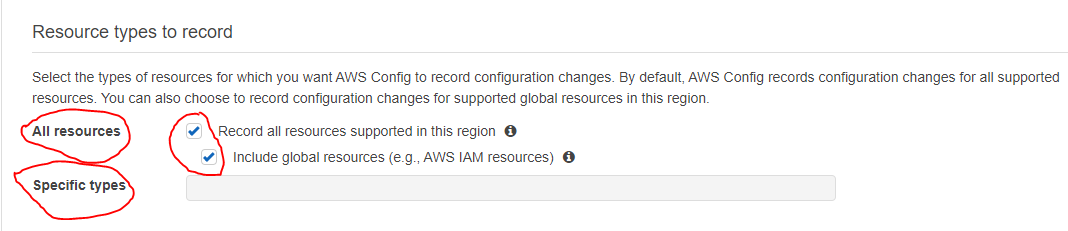
- For Recording, make sure that the value is On.
Under Resources Type to Record, for All Resources, select both check boxes:
- *Record all resources supported in this region
- *Include global resources (including IAM resources)
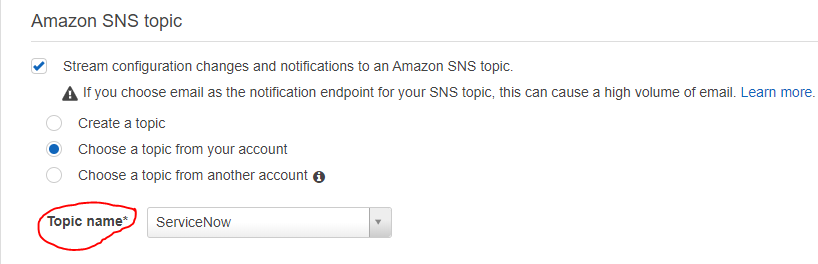
- Choose Choose a topic from your account.
- Choose Save.
AWS SNS policy update
- Click on services > type Simple in the search Box
- Click on Simple Notification Service
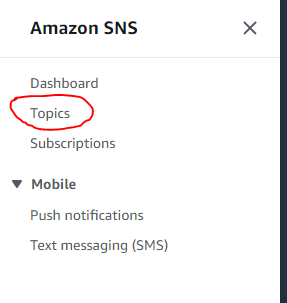
- In the left navigation pane, choose Topics
- Select your topic

- click on Edit

- Go to Access Policy

- Update the code as below
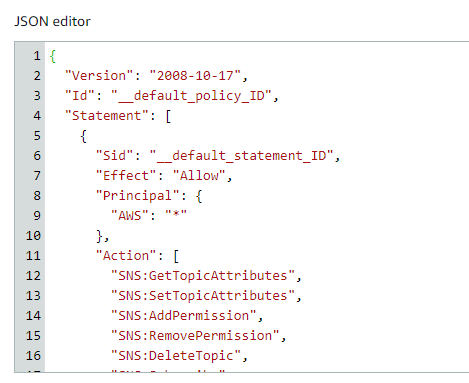
      {
      "Version": "2008-10-17",
      "Id": "__default_policy_ID",
      "Statement": [
        {
          "Sid": "__default_statement_ID",
          "Effect": "Allow",
          "Principal": {
            "AWS": "*"
          },
          "Action": [
            "SNS:GetTopicAttributes",
            "SNS:SetTopicAttributes",
            "SNS:AddPermission",
            "SNS:RemovePermission",
            "SNS:DeleteTopic",
            "SNS:Subscribe",
            "SNS:ListSubscriptionsByTopic",
            "SNS:Publish",
            "SNS:Receive"
          ],
          "Resource": "*"
        }
      ]
    }
click on Save Changes

Testing the integration
You can test this integration by creating a stack from the AWS CloudFormation sample templates, which trigger recording in AWS Config. This process then creates SNS notifications, which creates a configuration item in the ServiceNow CMDB.
- In the AWS CloudFormation console, choose Create stack.
- Select a sample template.
- Under Specify Details, enter the following information:
- Choose Next.
- In the left navigation pane, choose Options, provide tags if needed, and then choose Next.
- At the bottom of the review page, choose Create. Wait for the stack creation to complete. 8.Navigate to ServiceNow, then Server to check whether a server was created.
If you see a new server entry, you successfully integrated AWS Config with the ServiceNow CMDB.
- Understanding Request, RITM, Task in ServiceNow
- Steps to create a case in ServiceNow (CSM)
- Performance Analytics in 10 mins
- Event Management in 10 minutes - part1
- Event Management in 10 minutes - part2
- Custom Lookup List
- Script includes in 5 minutes
- Interactive Filter in 5 minutes
- UI Policy in 6 Minutes
- Client Side Script Versus Server Side Script in 3 minutes
-
Snow
- Performance Analytics
- ServiceNow Scripts
- Script include
- Useful scripts
- Basic Glide Scripts
- Client Script
- Advance Glide Script
- Glide System Script
- Admin
- Import Set
- Work Flow
- ACL
- SLA
- Notification
- Core Application
- UI Policy
- UI Action
- Client Script
- CAB Workbech
- Data Policy
- Connect Support
- Catalog
- Discovery
- CSM
- Event Management
- HR
- Integrations
- SSO Integration
- LDAP Integration
- SCCM Integration
- AWS Intergration
- Slack Integration
- CTI Integration
- Jira Integration
- Ebonding ServiceNow
- SOAP Integration
- IBM Netcool Integration
- VIP Mobile App Integration
- Rest Integration
- Service Portal
- Questions
- ACL
- Performance analytics(PA) Interactive Filter
- Various Configurations in Performance analytics(PA)
- Service Portal
- Performance Analytics(PA) Widgets
- Performance Analytics(PA) Indicator
- Performance Analytics(PA) Buckets
- Performance Analytics(PA) Automated Breakdown
- Client Script
- Rest Integration
- Understanding the Request, RITM, Task
- Service Catalogs
- Events in ServiceNow
- Advance glide script in ServiceNow
- CAB Workbench
Author
Chandrima
With 9+ years of ITSM development experience,Chandrima likes to deep dive ServiceNow modules.She have extensively worked on PA,Service Portal,Event management.
Comments